Property Damage Photo Checklist: What to Photograph After a Loss
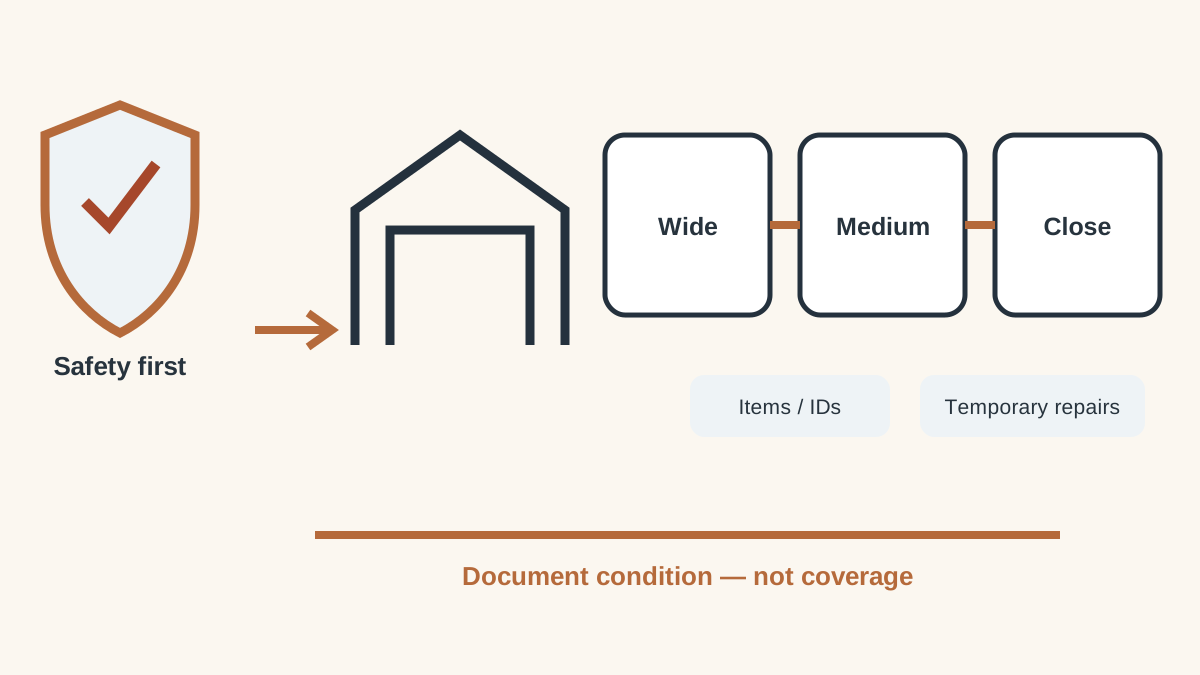
Safety comes first. Do not enter an unsafe structure, approach electrical hazards, handle contaminated materials, climb unstable surfaces, or delay emergency action just to take pictures.
When it is safe to document property damage, photos and videos can help preserve a record of the scene before cleanup, debris removal, or repairs change it.
The National Association of Insurance Commissioners advises consumers to document losses, take photos or videos, make a list of damaged items, and—when possible—save damaged property for inspection before disposal. NAIC also recommends temporary steps to prevent further damage after the loss has been documented.
This is a general educational checklist, not an insurer's official claim form or a coverage standard. It does not determine whether a loss, item, repair, or expense will be covered or reimbursed. Follow the instructions that apply to your insurer, policy, state, and situation.
Quick summary
If the area is unsafe, do not enter it for documentation.
When it is safe, photograph damage in layers:
- exterior or overall context;
- wide room or area views;
- medium views showing where the damage is located;
- close-ups of specific damage;
- damaged belongings and identifying details;
- temporary repairs and related receipts.
Document before moving or discarding damaged property when practical, keep the original files, and avoid editing images in a way that changes or removes context.
Safety comes before documentation
A complete photo record is not worth entering a dangerous area.
Do not enter or remain in a space if there is a risk from:
- fire;
- structural collapse;
- live electricity;
- gas;
- floodwater;
- sewage;
- unstable trees or roofing;
- hazardous debris;
- chemicals;
- other unsafe conditions.
If emergency services, utility workers, a building official, or another responsible authority tells you to stay out, follow that direction.
If you cannot safely photograph the damage, document what you can from a safe location and keep notes about why access was limited.
A 15-minute first-pass checklist
If the area is safe and you need a quick starting process:
- Photograph the outside or overall affected area.
- Photograph every affected room from the doorway.
- Take wide shots from multiple angles.
- Take medium shots of each damaged zone.
- Take close-ups of major damage.
- Photograph damaged belongings in place.
- Capture labels or serial numbers for important items when visible.
- Photograph any temporary repairs before and after.
- Save receipts and service documents.
- Back up the files somewhere separate from the damaged property.
Then create a written list of damaged property and continue documenting systematically.
Before you start: preserve the scene when practical
If the property is safe enough to enter, take an initial set of photos before:
- cleaning;
- moving damaged items;
- throwing items away;
- making permanent repairs;
- repainting;
- replacing flooring;
- removing damaged materials.
NAIC guidance emphasizes documenting losses before removing debris or belongings when possible.
There are situations where damaged property must be moved or discarded for health, safety, or emergency reasons. If that happens, photograph it first when you safely can and keep records of what was removed and why.
Use the wide-medium-close method
A strong photo record should show both detail and context.
One close-up of a damaged wall may show the stain, but not which wall it is or how much of the room is affected.
Use three levels.
1. Wide shots
Take a few images showing the entire room, structure, vehicle area, or affected zone.
The goal is orientation.
For a room, photograph from more than one corner if possible.
For exterior damage, capture the building side, roofline, yard, driveway, or surrounding area from a safe distance.
2. Medium shots
Move closer and show where the damage sits within the larger area.
Examples:
- the full damaged section of ceiling;
- the wall and window around a leak;
- the cabinet area around water damage;
- the group of damaged belongings in one room.
3. Close-ups
Then photograph the specific damage.
Examples:
- cracks;
- stains;
- broken surfaces;
- damaged finishes;
- torn materials;
- damaged appliances;
- affected furniture;
- serial or model labels.
This sequence makes the close-up easier to understand later.
Exterior damage checklist
When safe and relevant, photograph:
- each affected side of the building;
- roof damage from ground level or another safe location;
- damaged siding;
- windows and doors;
- gutters;
- fences;
- detached structures;
- fallen limbs;
- exterior equipment;
- visible water lines;
- debris location;
- damaged outdoor belongings.
Do not climb onto a damaged roof solely to take photographs.
If a professional later inspects an inaccessible area, ask for copies of relevant photos or reports when appropriate.
Interior room checklist
For each affected room, capture:
- room entrance or doorway;
- wide room view;
- ceiling;
- walls;
- floor;
- windows and doors;
- built-in cabinets or fixtures;
- damaged furniture;
- damaged electronics or appliances;
- groups of personal property.
If damage continues through several rooms, repeat the same sequence room by room.
Consistency makes the record easier to review.
Photograph damaged items individually when practical
A pre-loss home inventory is useful because it records what existed before damage.
After a loss, you may need a separate record of what is actually damaged.
For higher-value or identifiable items, photograph:
- the full item;
- the damaged area;
- brand;
- model number;
- serial number when visible;
- packaging or labels when relevant;
- receipt or purchase record if available.
Do not publish or share sensitive serial-number photos publicly.
Keep them with the private claim file.
Capture quantity, not just one representative item
If several similar items were damaged, one picture may not show the total quantity.
For example, if a shelf contains damaged boxes, tools, clothing, or supplies:
- take a wide image showing the group;
- then take additional photos that make the quantity and condition understandable.
Avoid staging items into an arrangement that misrepresents where they were or what happened.
The purpose is documentation, not presentation.
Photograph water or moisture context without guessing the cause
If there is visible water damage, photograph:
- water lines;
- staining;
- affected surfaces;
- wet belongings;
- nearby fixtures;
- visible openings or damaged building components.
Do not label a cause as a fact unless it is actually known.
For example:
“Water staining below upstairs bathroom”
is an observation.
“Pipe failure caused all damage”
is a conclusion that may require inspection.
Keep observations separate from diagnosis.
Photograph temporary repairs
After documenting the loss, reasonable temporary steps may be needed to prevent additional damage.
Examples could include:
- covering an opening;
- boarding a broken window;
- moving undamaged property away from water;
- temporary water removal;
- emergency protective work.
Before the temporary repair, photograph the damage.
Then photograph:
- the temporary work;
- materials used;
- receipts;
- contractor or service documentation.
Keep permanent repairs separate until you have followed the instructions that apply to your claim and situation.
Save damaged property when practical
NAIC consumer guidance recommends saving damaged items for inspection when possible.
If it is safe and reasonable, do not discard damaged property until you understand whether the insurer or adjuster may need to inspect it.
If an item must be discarded because it is unsafe, contaminated, or cannot reasonably remain on the property:
- photograph it;
- record what it was;
- record the reason it was removed;
- keep any disposal or cleanup records.
Your insurer's instructions may differ, so contact the company or agent when you are unsure.
Keep a photo log
You do not need a complicated system.
A simple spreadsheet or document can include:
| Photo/File | Date | Location | Item/Area | Description | Related Receipt/Document |
|---|---|---|---|---|---|
| IMG_1042 | Sept. 5 | Kitchen | Ceiling | Wide view of ceiling staining | None |
| IMG_1045 | Sept. 5 | Kitchen | Ceiling | Close-up of damaged drywall | Plumber report |
| IMG_1060 | Sept. 5 | Kitchen | Refrigerator | Water damage at base | Purchase receipt |
This gives the images context without changing the original files.
A simple file-naming system
If you have dozens or hundreds of images, rename copies or organize folders using a consistent pattern.
Example:
2026-09-05_Kitchen_Wide_01.jpg
2026-09-05_Kitchen_Ceiling_Close_02.jpg
2026-09-05_Bedroom_Dresser_03.jpg
You do not have to rename the camera originals.
A safer approach is to preserve originals and organize working copies separately.
Keep original files
Original image files preserve the version captured by the device.
Avoid:
- heavy editing;
- filters;
- removing objects;
- changing timestamps;
- adding damage that was not present.
Cropping a copy for easier viewing may be useful, but keep the original.
If you annotate a copy, label it as an annotated copy.
Video can add context
A slow walkthrough can complement still photos.
If you record video:
- move slowly;
- identify the room or area;
- avoid fast panning;
- pause on major damage;
- do not rely on narration alone;
- still take separate photos of important details.
Video is useful for context, while still photos are easier to organize around specific damaged items.
Document receipts and emergency expenses
Keep records connected with:
- temporary repair materials;
- emergency services;
- cleanup;
- replacement of immediately necessary items;
- contractor visits;
- inspection fees when applicable.
Whether a particular expense is covered depends on the policy and facts of the claim.
This checklist does not determine reimbursement.
Privacy: be careful what appears in the frame
Damage photos can accidentally capture sensitive information.
Before sharing files, check for:
- credit cards;
- bank statements;
- passwords;
- keys;
- alarm codes;
- passports;
- driver's licenses;
- medical information;
- children's identifying information;
- computer screens;
- confidential work documents.
Preserve the original record if needed, but share only what is relevant through the insurer's approved channel.
What not to do
Do not risk injury for a better picture
No claim photo is worth entering an unsafe area.
Do not clean everything before creating any record
When safe and practical, document first.
Do not take only close-ups
Close-ups without context can be difficult to understand.
Do not discard damaged items immediately when they can reasonably be retained
The insurer or adjuster may need to inspect them.
Do not make damage look worse
Do not stage, alter, or misrepresent the condition.
Do not assume a photo proves coverage
A photo can document condition. It does not decide whether the policy covers the loss.
Do not assume every permanent repair should begin immediately
Follow the instructions that apply to your claim and take reasonable temporary steps to prevent further damage where appropriate.
Before-loss photos still matter
If you already have a home inventory, use it as a reference for what existed before the loss.
If you do not have a formal inventory, older personal photos may still help identify belongings.
NAIC consumer guidance notes that prior photos can help reconstruct a list when records were lost or destroyed.
Do not change old photos or present them as post-loss evidence. Keep the pre-loss and post-loss records clearly separate.
The purpose of the photo record
A good photo record should help another person answer:
- What area is this?
- What did it look like after the loss?
- What property is damaged?
- How much of the area is affected?
- What was moved, removed, or temporarily repaired?
- What supporting documents exist?
That is enough.
You are documenting the condition, not making the final coverage determination.
Related LaCopper tools and guides
Use this checklist with:
- the Claim Photo and Document Checklist;
- How to Prepare a Home Inventory Before a Claim;
- How to Read an Insurance Declarations Page;
- Actual Cash Value vs Replacement Cost: General Terminology.
The home inventory records what you had before a loss. The claim photo record documents what happened afterward.